

美术UI在公司是宝贵的资源,集各种项目宠爱于一身。为了努力完成好老板的进度需求,不给UI添麻烦。程序员开始忙活了。
在iOS里面,我们使用image assert来管理素材和app icon。为什么呢?因为方便,按照image assert要求的尺寸拖进去就好了。 Image Assert方便适配各种大小的屏幕
什么?UI只给你大图,压缩啥的自己搞。What the f**k!胸中无限感慨,我们是光荣伟大的Coder乜!come on!
1、缩放图片到指定尺寸
用过PS么?用过美图秀秀么?
好吧,没有我也不勉强你,估计你也不会美颜、磨皮、消下巴、变大眼睛、美白吧!用的很熟练,你也不用看这篇东东了。
来吧,在Mac下给你一个神器sips,一个命令行工具,哈哈!sips这玩意是命令行处理图片大小的,可以方便的用来修改图片的各种尺寸。 button按钮素材
如果一个图片button.png为256*256的,压成@2x和@1x的话,按照2/3、1/3来压缩得到171*171 和85*85的素材。那么sips命令就是这样使用(在shell命令行里):
- cp button.png button@3x.png
- sips -z 171 171 button.png --out button@2x.png
- sips -z 85 85 button.png --out button.png
button@2x.png\buttong@3x.png三个素材图片了,把它们拖到image assert里面来管理吧。在iOS界面Storyboard中可以直接使用button图片,配合AutoLayout自动适配不同尺寸设备。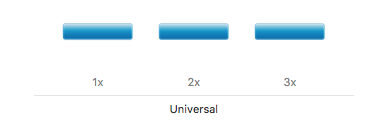 button assert
PS:sips命令各种参数不熟悉的,可以在命令行里自行输入sips –help进行学习。
2、获取图片尺寸,等比例缩放图片
上面我们是预先知道了图片的宽和高,然后自己进行了宽和高乘以2/3、1/3的处理,但是如果图片素材很多,你总不可能一个一个的搞几天啊,这不科学。我们是光荣伟大的Coder乜!嗯嗯,sips会给我们答案的,使用下面两行命令分别获取图片素材的宽和高:
- sips -g pixelHeight button.png awk -F: {print $2}
- sips -g pixelWidth button.png awk -F: {print $2}
- fileName3x=${imageFile/\.png/@3x\.png}
-
- # 4 拷贝并进行压缩
- cp $1 $fileName3x
- sips -z $height2x $width2x $1 --out $fileName2x
- sips -z $height1x $width1x $1
- }
-
- 打开命令行,进入跟这个文件夹一级的文件夹,将Shell脚本放入。Shell脚本是这个样子滴:
- #!/bin/sh
-
- # 0 进入素材文件夹
- cd $1
-
- # 1 遍历当前文件夹下的所有文件,即所有图片素材了。
- for file in ./*
- do
- # 2 获取图片的文件名,并生成 “文件名.imageset”文件夹,方便下一步处理
- imageFile=$(basename $file)
- imageDir=${imageFile/\.png/\.imageset}
- mkdir $imageDir
-
- # 3 将图片拷贝入“文件名.imageset”文件夹,并进入该文件夹
- cp $imageFile $imageDir/
- cd $imageDir
-
- # 4 执行ScalePic函数,将图片文件名作为参数。最后处理完后,退回上一级目录
- ScalePic $imageFile
- cd ..
- done
-
- cd ..
-
- done
- cd ..
- ScalePic $imageFile
-
- cd $imageDir
- cp $imageFile $imageDir/
-
- mkdir $imageDir
- imageDir=${imageFile/\.png/\.imageset}
- imageFile=$(basename $file)
- # 2 获取图片的文件名,并生成 “文件名.imageset”文件夹,方便下一步处理
- do
- for file in ./*
-
- cd $1
-
如下图所示,ImageSet文件夹都是以“.imageset”结尾的,里面包含三个图像素材和一个“Contents.json”文件。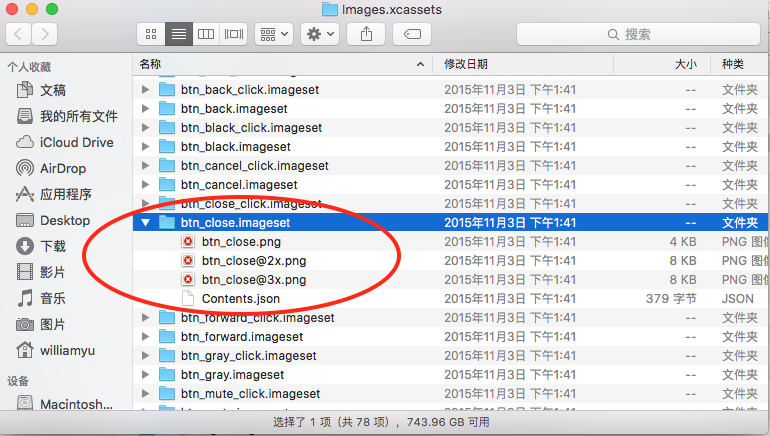 ImageSet文件夹结构
我们打开“Contents.json”文件,里面的结构如下:- {
- images : [
- {
- idiom : universal,
- scale : 1x,
- filename : btn_close.png
- },
- {
- idiom : universal,
- scale : 2x,
- filename : btn_close@2x.png
- },
- {
- idiom : universal,
- scale : 3x,
- filename : btn_close@3x.png
- }
- ],
- info : {
- version : 1,
- author : xcode
- }
- }
- }
- author : xcode
- version : 1,
- info : {
- ],
- }
- filename : btn_close@3x.png
- scale : 3x,
- idiom : universal,
- {
- },
- filename : btn_close@2x.png
- scale : 2x,
- idiom : universal,
- {
- },
- filename : btn_close.png
- scale : 1x,
- idiom : universal,
- {
- images : [
- #!/bin/sh
- renameFile3x=${imageFile/\.png/@3x\.png}
-
- echo {>> Contents.json
- echo \images\ : [>> Contents.json
- echo {>> Contents.json
- echo \idiom\ : \universal\,>> Contents.json
- echo \scale\ : \1x\,>> Contents.json
- echo \filename\ : \$imageFile\>> Contents.json
- echo },>> Contents.json
- echo {>> Contents.json
- echo \idiom\ : \universal\,>> Contents.json
- echo \scale\ : \2x\,>> Contents.json
- echo \filename\ : \$renameFile2x\>> Contents.json
- echo },>> Contents.json
- echo {>> Contents.json
- echo \idiom\ : \universal\,>> Contents.json
- echo \scale\ : \3x\,>> Contents.json
- echo \filename\ : \$renameFile3x\>> Contents.json
- echo }>> Contents.json
- echo ],>> Contents.json
- echo \info\ : {>> Contents.json
- echo \version\ : 1,>> Contents.json
- echo \author\ : \xcode\>> Contents.json
- echo }>> Contents.json
- echo }>> Contents.json
-
- }
- mkdir $imageDir
-
- # 3 将图片拷贝入“文件名.imageset”文件夹,并进入该文件夹
- cp $imageFile $imageDir/
- cd $imageDir
-
- # 4 执行ScalePic函数,将图片文件名作为参数。
- # 执行Contents函数,生成描述文件Contents.json
- # 最后处理完后,退回上一级目录
- ScalePic $imageFile
- Contents $imageFile
- cd ..
- done
-
- cd ..
- }
-
- for size in29 40 50 57 58 60 72 76 80 87 100 114 120 144 152 180
- do
- IconWithSize $size
- done
- 复制代码
希望大家能够利用工具简化一切操作!我们是光荣伟大的Coder乜!以上。、
文/小武 技术渔场
锐亚教育,游戏开发论坛|游戏制作人|游戏策划|游戏开发|独立游戏|游戏产业|游戏研发|游戏运营| unity|unity3d|unity3d官网|unity3d 教程|金融帝国3|8k8k8k|mcafee8.5i|游戏蛮牛|蛮牛 unity|蛮牛
- IconWithSize $size
- do
-
-
- done
- cd ..
- Contents $imageFile
- ScalePic $imageFile
- # 最后处理完后,退回上一级目录
- # 执行Contents函数,生成描述文件Contents.json
-
- cd $imageDir
- cp $imageFile $imageDir/
-
-
- echo }>> Contents.json
- echo }>> Contents.json
- echo \author\ : \xcode\>> Contents.json
- echo \version\ : 1,>> Contents.json
- echo \info\ : {>> Contents.json
- echo ],>> Contents.json
- echo }>> Contents.json
- echo \filename\ : \$renameFile3x\>> Contents.json
- echo \scale\ : \3x\,>> Contents.json
- echo \idiom\ : \universal\,>> Contents.json
- echo {>> Contents.json
- echo },>> Contents.json
- echo \filename\ : \$renameFile2x\>> Contents.json
- echo \scale\ : \2x\,>> Contents.json
- echo \idiom\ : \universal\,>> Contents.json
- echo {>> Contents.json
- echo },>> Contents.json
- echo \filename\ : \$imageFile\>> Contents.json
- echo \scale\ : \1x\,>> Contents.json
- echo \idiom\ : \universal\,>> Contents.json
- echo {>> Contents.json
- echo \images\ : [>> Contents.json
-
-
- }
- sips -z $height1x $width1x $1
- sips -z $height2x $width2x $1 --out $fileName2x
- cp $1 $fileName3x
-
- 还没有人评论,欢迎说说您的想法!


